READING MAPS: UNDERSTANDING CROSS-SECTIONS
What is a cross-section?
A cross-section is an individual drawing on a map, that shows a vertical “slice” of the plan view.
They are arguably one of the most important parts of an underwater cave map, as even the simplest style of cross-section can quickly teach a diver more about the usable shape of a cave than a detailed plan view.

Step One: Determine the scale.
The first step to reading a cross-section is to determine the scale. Cross-sections are frequently drawn to a larger scale than the plan view because the print size of most maps is too small to show a readable profile view of the cave. (Most underwater caves are much wider than they are tall).
There are two common scenarios of how a cartographer will show the differing scales of the cross-sections and plan view on a map:
1. All cross-sections use a consistent scale, but larger than the plan view. For example, the cartographer may note that all of the cross-sections have been drawn to 2x the scale of the plan view.
The advantage to this method is that a diver can quickly compare the profile or shape of all of the tunnels to determine the best route for their equipment configuration / experience level.
The disadvantage is that the lower ceiling sections of the cave will most likely be a little too small to show any detail, aside from the fact that the tunnel has a low ceiling.

2. Each cross-section is drawn to the necessary scale required to show the desired level of detail. For example, when the tightest sections of the cave must be drawn to an even larger scale than the rest of the cross-sections. Note that maps using this method will have individual scales for each cross-section.
The advantage to this method is that significantly more detail can be shown per cross-section.
The disadvantage is that a diver can not easily see how the profile or shape of the passages compare to each other.

Step Two: Determine the orientation.
Cartographers use arrows to show from which direction they were facing when drawing a cross-section.
This direction is very important to note, as divers who learn about back-referencing during their cave training will already know, a cave can look totally different on the way out! Using a cross-section as a reference the wrong way around can easily cause confusion underwater.
1. Look for the directional arrow of a cross-section and take note of its orientation in comparison to the direction you will be traveling.
Not all cross-sections will be drawn facing into the cave from the entrance side!
2. Visually follow the section lines to the cross-section.
If you are swimming in the same direction as the arrow, the left side of the cross-section would be what is shown to your left, and vice versa.

Step Three: Look for the usable space.
A detailed plan view often fails to intuitively display important features of a cave.
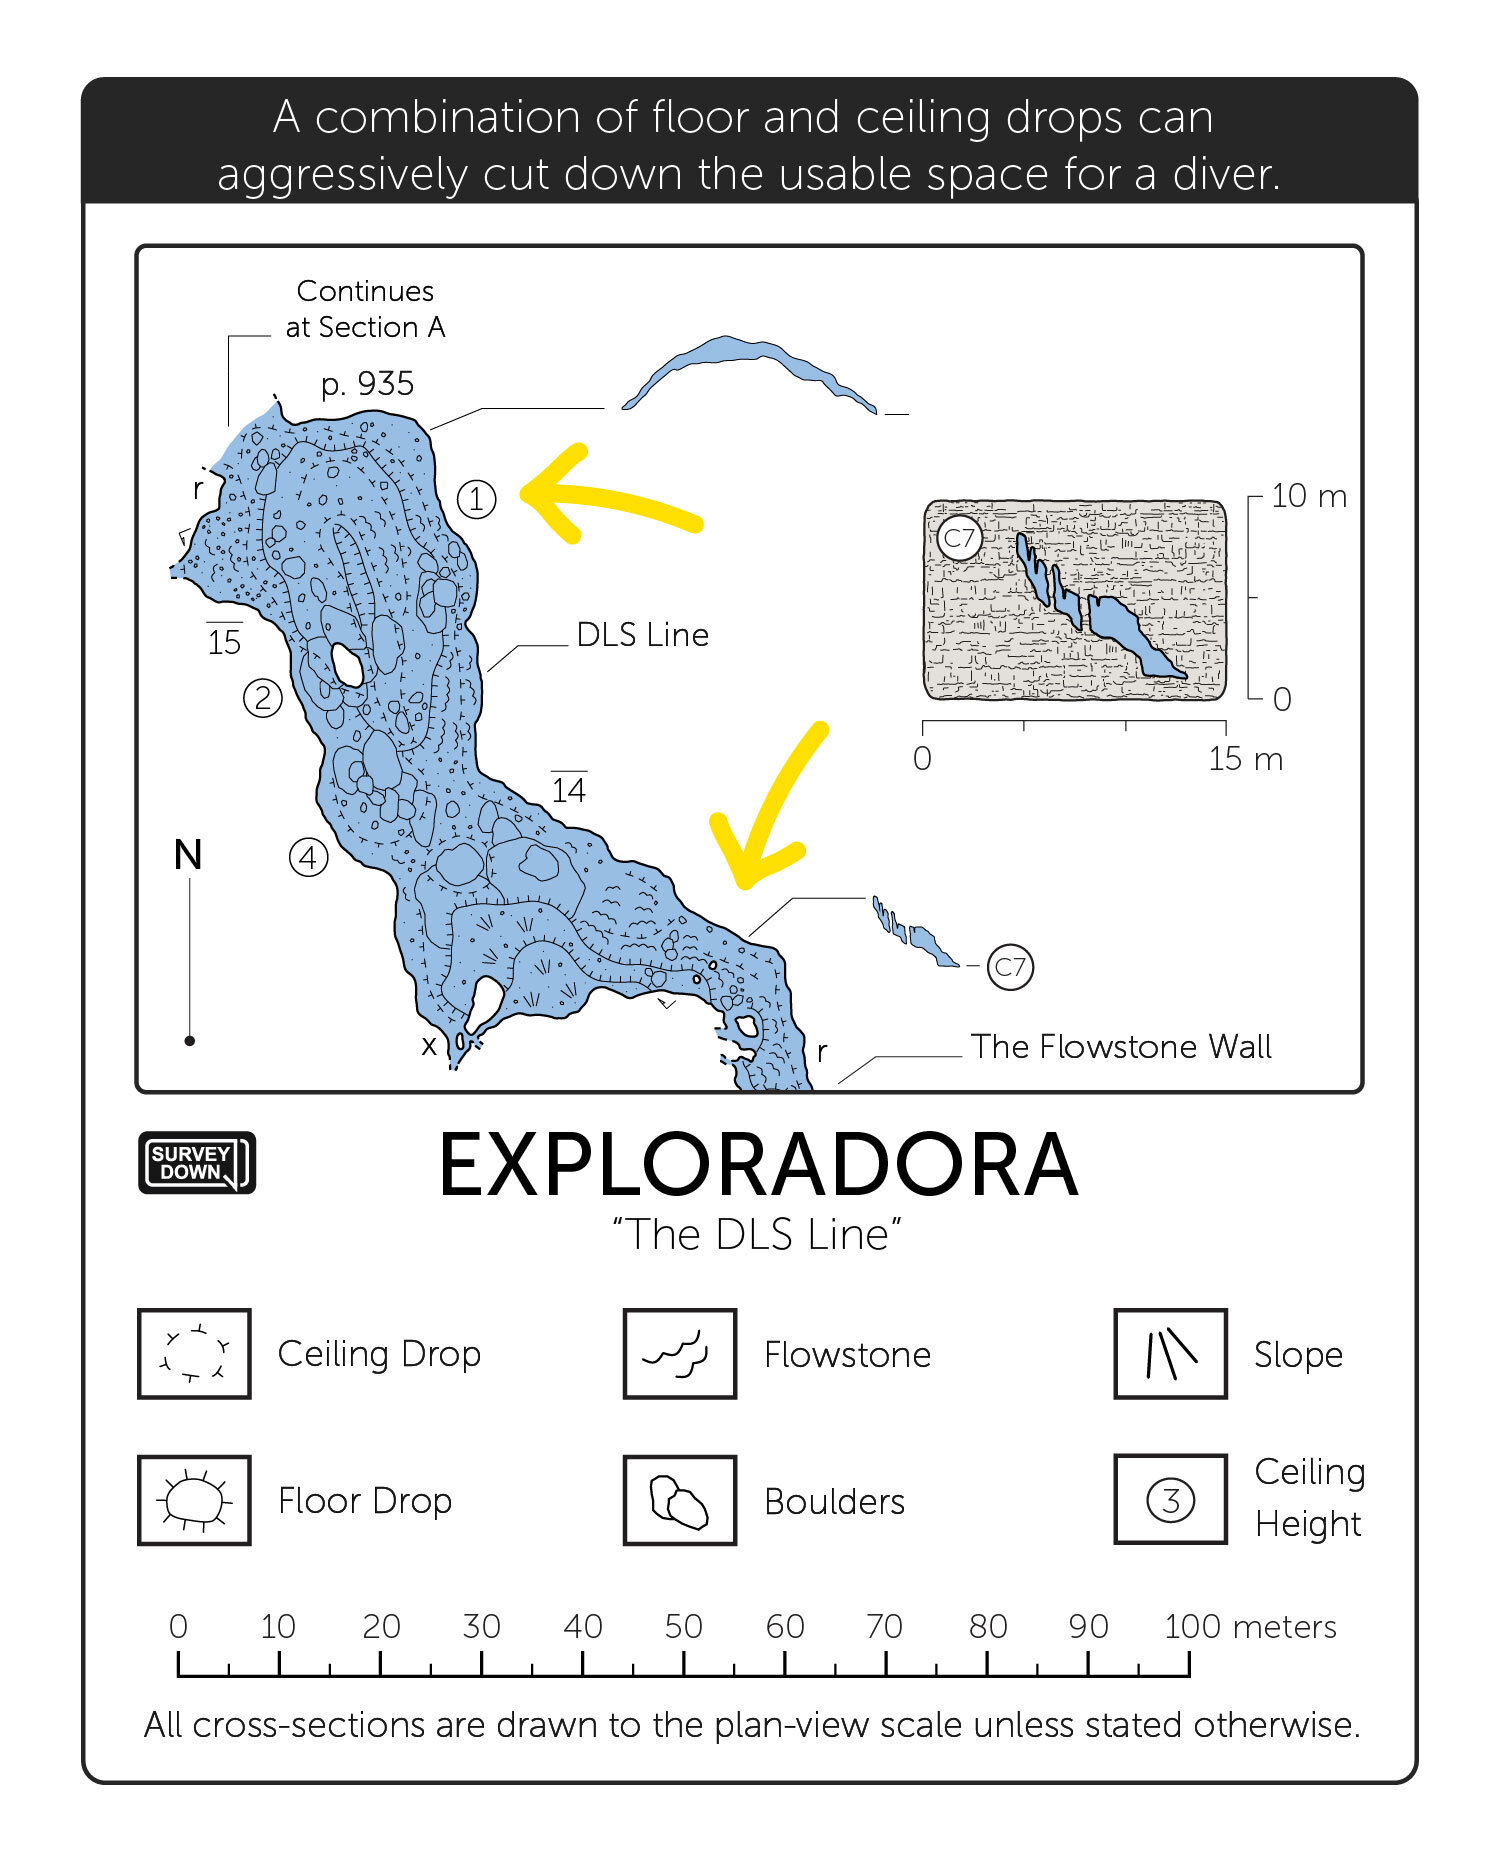
For example, one of the most common plan view features overlooked by divers is the ceiling drop; a step-down or taper in the cave ceiling. Very often this taper will aggressively cut down the area usable to a diver, despite the plan view showing a super-wide tunnel. Throw in a single, tiny column, and the widest section of a cave becomes a major restriction!
Cross-sections excel at showing these misleading passages for what they are!
1. Use the cross-section to make sense of what the plan view symbols actually represent.
Pay close attention to how the ceiling drops, floor drops, slopes, flowstone, speleothems, and boulders are affecting the cave passage.
2. Use this information to determine what the nearby passages that do not have cross-sections, may actually look like.